Taxes are a headache for every online merchant. Different states, countries, and sometimes even cities have their taxation. How not to get confused and avoid unnecessary problems? Without further interruptions, let’s dive into our guide.
The best way to configure taxes in Magento | Adobe Commerce is to follow the next route:
- Tax Zones and Rates;
- Tax Rules;
- Tax Settings.
We’ll guide you through all of these stages and explain how to set up each.
Tax Zones & Rates
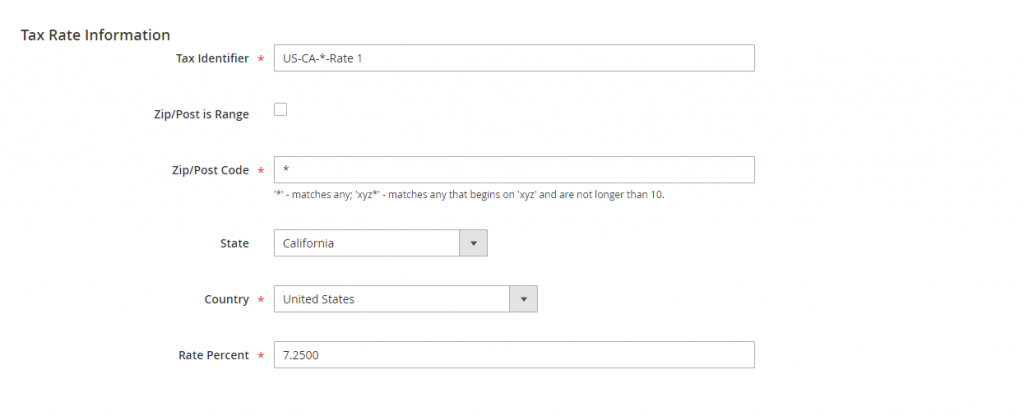
Imagine that you need to set up a 7.25% tax rate for California. First of all, you need to go to Stores > Tax Zones and Rates > Add New Tax Rate.
Then, you need to complete the next fields:
- Tax Identifier. Here, you need to set a unique name for your tax zone (e.g., US-CA). You can name it whatever you want, but we recommend doing something similar to our example. The reason is that you may have a long list of tax zones, so you should know what rates you have to avoid helter-skelter.
- Zip/Post is Range. Usually, you don’t need this checkbox as you set rates for all zip codes in your zones as one rate. However, if you select it, you’ll be able to insert a starting and ending zip code. This way, you can apply your tax rate to all zip codes between this range.
- Zip/Post Code. If you want to apply the rate to all zip codes in California, place * in this field (the same goes to any state or country if you want to apply taxes to specific zip codes, enter them).
- State. Select a state to apply your rate.
- Country. Select the US (or a needed country) to apply your rate.
- Rate Percent. Enter the sales tax rate for this specific zone.
We’ve only defined the tax zone and rate for California, which means that Magento | Adobe Commerce still doesn’t charge this sales tax. Now, we need to set up sales tax rules to trigger this zone and rate.
Tax Rules
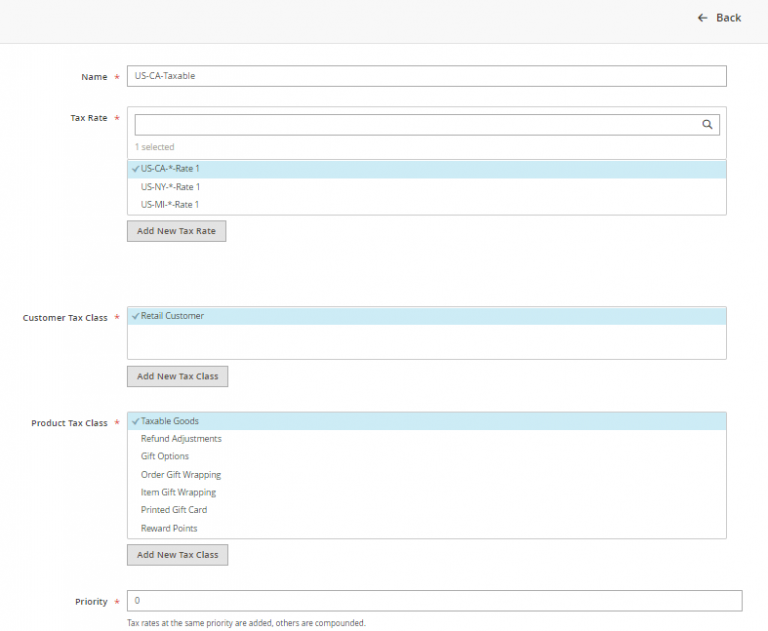
Go to Stores > Tax Rules to add a rule that will trigger the California US zone and rate for it.
Then:
- Set the Name for your rule;
- Select a Tax Rate (tax zone that we created during the first step);
- Select Customer Tax Class, which is Retail Customer (it’s possible to add more customer tax classes if you have customers who are sales tax exempt);
- Select Product Tax Class, which is Taxable Goods
- Leave the Priority field default which is 0;
- Leave the Calculate Off Subtotal Only box unticked
- Leave the Sort Order field as it is unless you have some preferences in which order to display rules
- Import/Export is useless if you configure these things for the first time. However, if you set up these things on other instances of Magento | Adobe Commerce, it relieves you from manual work.
Note: Tax Rate is a multi-select field as one rule can trigger multiple zone and rates. For example, if settings on the screenshot are the same for California and Michigan customers, you can select both zones in this field. In this case, customers from these states will be charged depending on their addresses.
After saving the rule, we need to set the way to calculate and display taxes on the checkout page.
Tax Settings
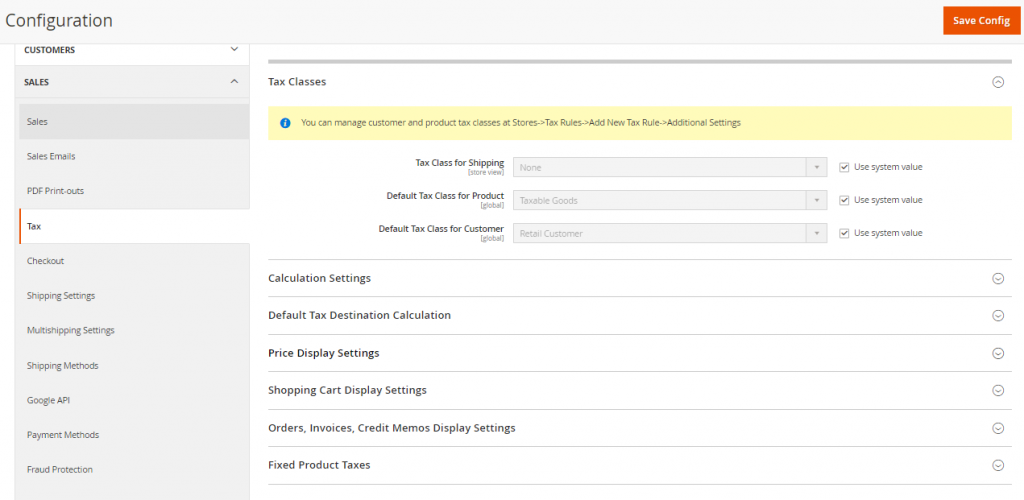
Navigate to Stores > Configuration > Sales > Tax.
The first tab you’ll see is Vertex Settings, a third-party tool you may pay for and manage tax settings through it. However, we won’t cover it in this tutorial and restrict ourselves to default functionality.
Let’s figure out everything at a time.
In all first three fields, Tax Class for Shipping, Default Tax Class for Product, and Default Tax Class for Customer, you can use default system values.
Calculation Settings
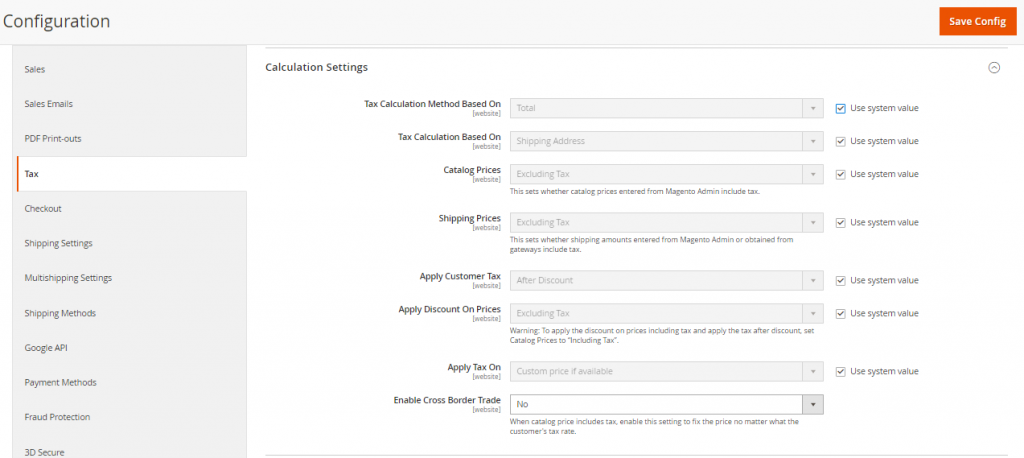 Tax Calculation Method Based On field has three options:
- Total. If you select this calculation method, Magento applies tax to all items in the cart separately, adds them together, and then applies rounding.
- Row Total calculation means that Magento taxes each row item (2x Blue T-Shirt M) without discounts and adds the other rows to form a taxed total price.
- Unit Price calculation means that Magento calculates taxes on each quantity of each product in the cart, then rounds those-up and adds them together.
- In the field Tax Calculation Based On we select if the defined rates apply to the customer’s Billing or Shipping address. The third option is Shipping Origin (merchant’s warehouse address from which the item ships).
- Catalog Prices field configuration stands for telling Magento if prices of products already include taxes or not. If you’re a US-based retailer select Excluding Tax. In European countries, the value-added tax (VAT) is already included in the product price.
- Configure Shipping Prices the same way as Catalog Prices. If you’re a US-based retailer, select Excluding Tax. If you operate in the EU, select Including Tax.
- The Apply Customer Tax field tells Magento when it should apply tax, Before or After the product’s price reduction applied by shopping cart price rules and coupons. If you’re a European merchant, find out which option works better for you as it may cause some rounding errors in calculations.
- In the field Apply Discount On Prices, select if discounts should be applied on product price excluding tax or product price that includes tax. The choice depends on how you configured the previous settings.
- In the field Apply Tax On, select how the taxes should be calculated, based on the Custom Price or Original price. It’d be better to choose Custom Price as you want to apply taxes on a reduced price (special price, discounts, etc.).
- Enable Cross Border Trade. If you’re a US-based merchant, select No. For European merchants, it’s better to set this setting to Yes due to differences in tax rates among European countries.
Default Tax Destination Calculation
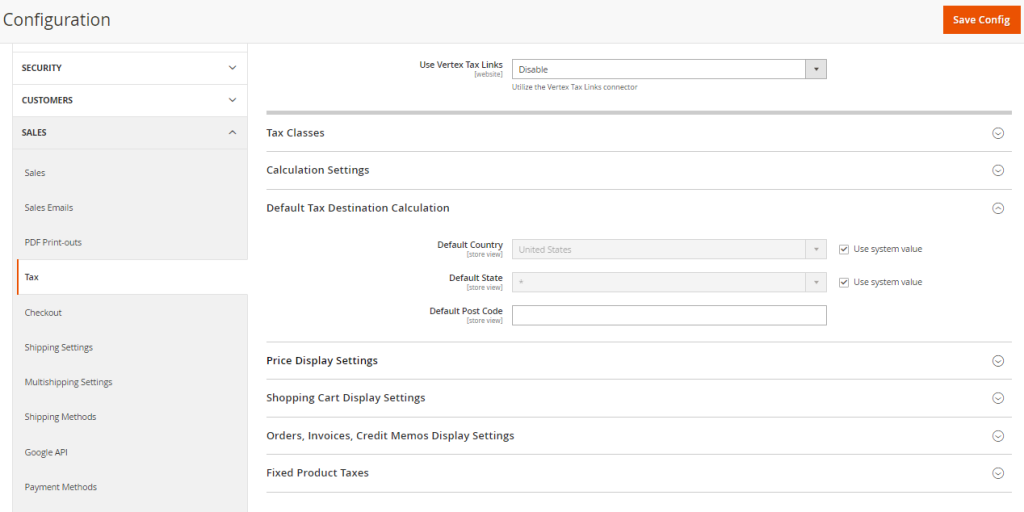 Magento | Adobe Commerce uses these settings to determine which zones/rates and tax rules to apply before the customer entered his own billing or shipping address.
Price Display Settings
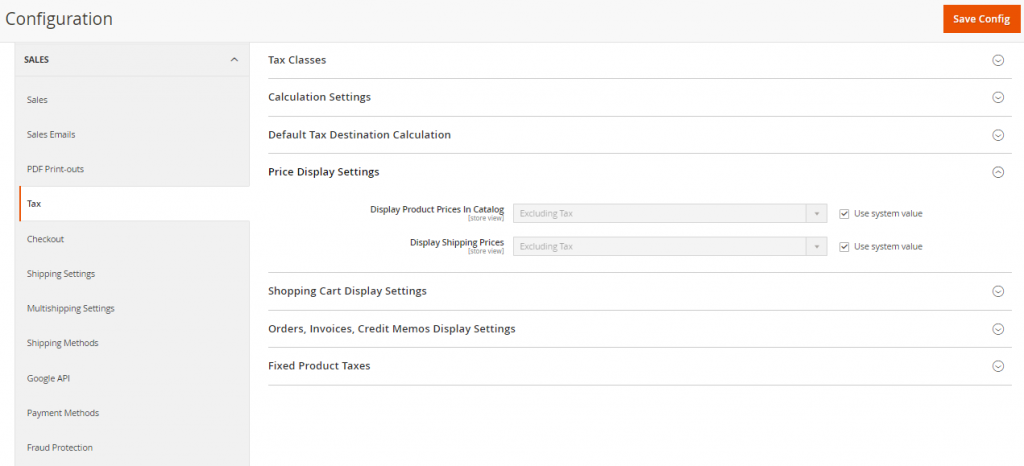 Here, you have three options both for Display Prices in Catalog and Display Shipping Prices dropdowns:
- Excluding Tax (USA)
- Including Tax (Europe)
- Including and Excluding tax
The setting controls if prices are displayed including or excluding tax on the front-end as well as in your Magento | Adobe Commerce admin area.
Shopping Cart Display Settings & Orders, Invoices, Credit Memos Display Settings
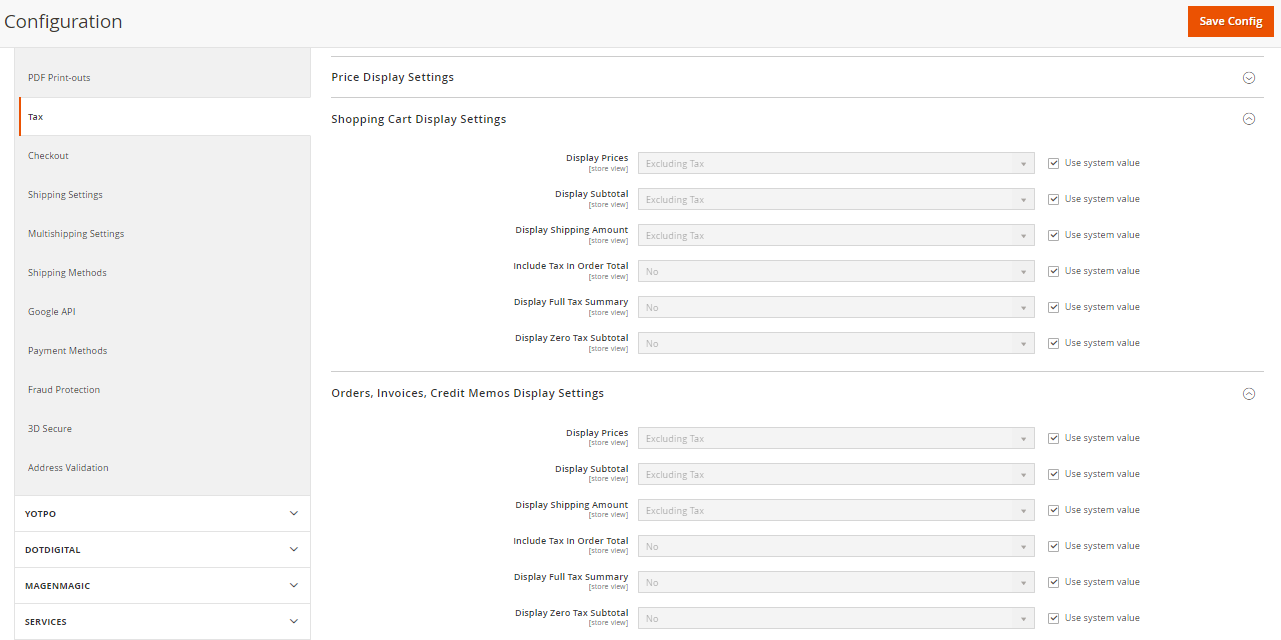 This section influences only the way tax is displayed on your cart page, in order-related e-mails and documents that Magento | Adobe Commerce generates (order, invoice). Set this section according to the requirements of your country/state.
Fixed Product Taxes
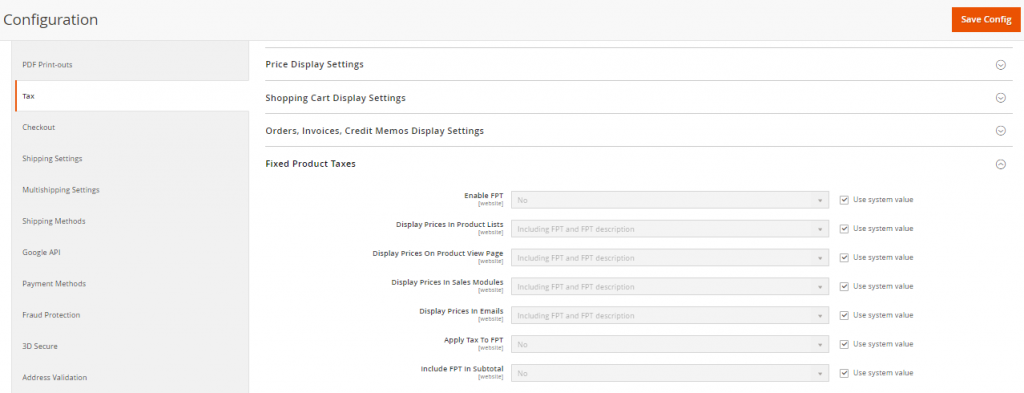 Some of your products may have specific taxes due to some regulations like eco-taxes or taxes applied to certain products in your catalog.
Enabling FPT does nothing, except cases when FPT combines with specific product attributes.
1. Go to Stores > Attributes > Product > Add New Attribute. In the Catalog Input Type for Store Owner dropdown, you can select Fixed Product Tax.
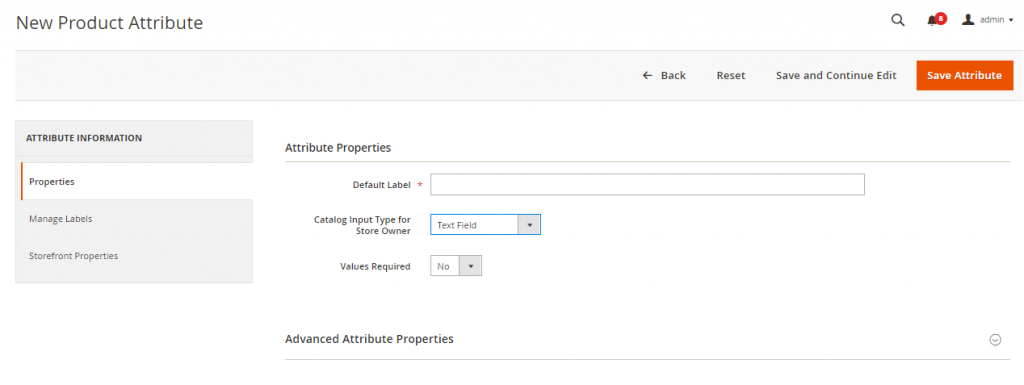 2. Expand Advanced Attribute Properties:
A. In the Attribute Code field, enter a unique identifier;
B. If you want the FPT field to appear in the Inventory grid, set Add to Column Options to Yes.
C. If you want to be able to filter products in the grid based on the value of the FPT field, set Use in Filter Options to Yes.
3. (Optional) In the panel on the left, choose Manage Labels. Then, enter a label to use instead of the default label for each store view.
4. Save Attribute, refresh the cache.
5. Go to Stores > Attributes > Attribute Set > tap the attribute set > drag the FPT attribute from the list of Unassigned Attributes on the right to the Groups list in the center column.
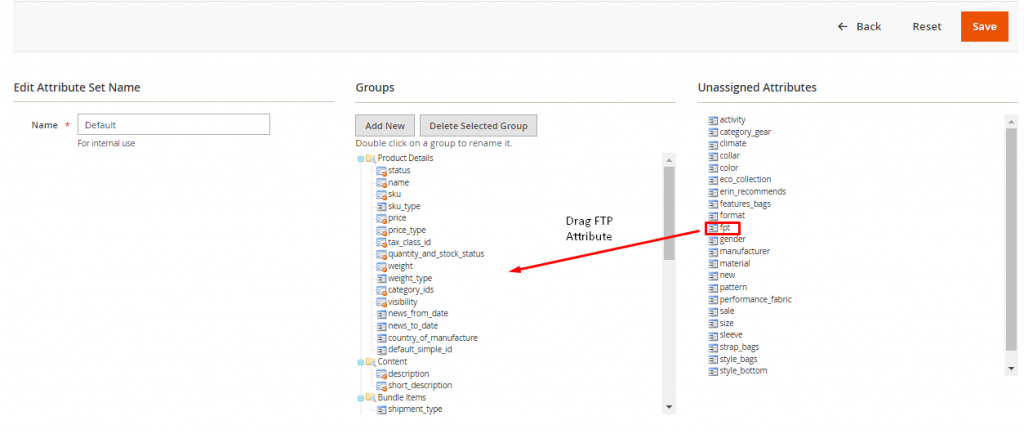 6. Save.
7. Repeat steps № 5 and 6 for each attribute set that needs to include fixed product tax.
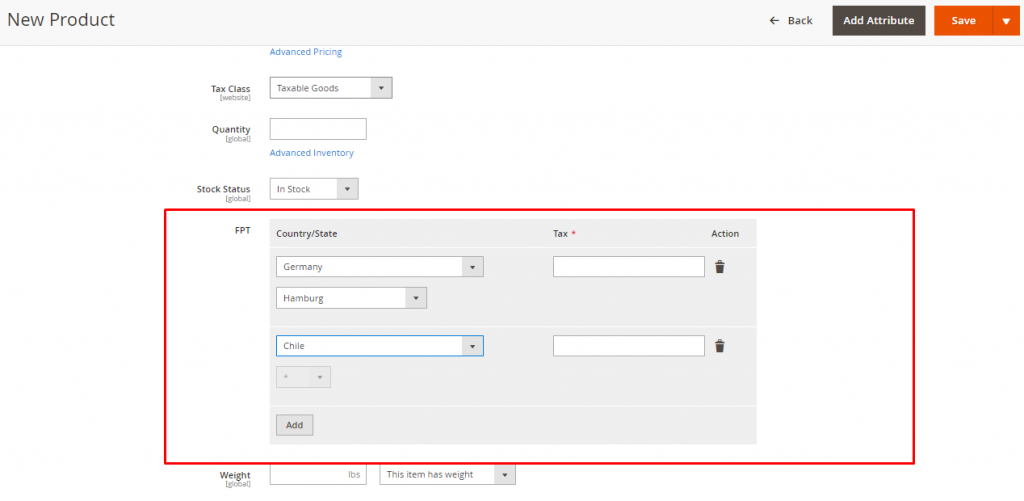
After these steps, you can apply FTP to specific products when creating or editing products.
 Mobecls team offers fixed-price service packages for Magento store support. Moreover, we’ll help you to choose a plan according to your business needs and specifics. The starting price is $2000. You can also select the number of working hours and the range of services. A service package may include updates, the installation of modules, bug fixing, SEO support and many more. Contact us and we’ll help you.